Writing e-mails, deleting e-mails and, of course, forwarding e-mails - in the IT Crowd series these skills were enough to get the position of the head of the IT department. We won't hide the fact that in reality, you'd probably need a bit more than that, but fortunately our goal is a bit more modest - to have a handle on everything related to the aforementioned mail handling in Microsoft Outlook.
As we mentioned in the introductory part of the tutorial, for examples and demonstrations we will use the Outlook 365 for Windows version, which is one of the applications of the Microsoft 365 subscription office suite (formerly known as Microsoft Office or Office 365). Other versions may differ in graphical design or slight differences in the placement of some user interface elements, but the layout and control principle are basically similar.
So a basic view of Open Mail might look something like this:
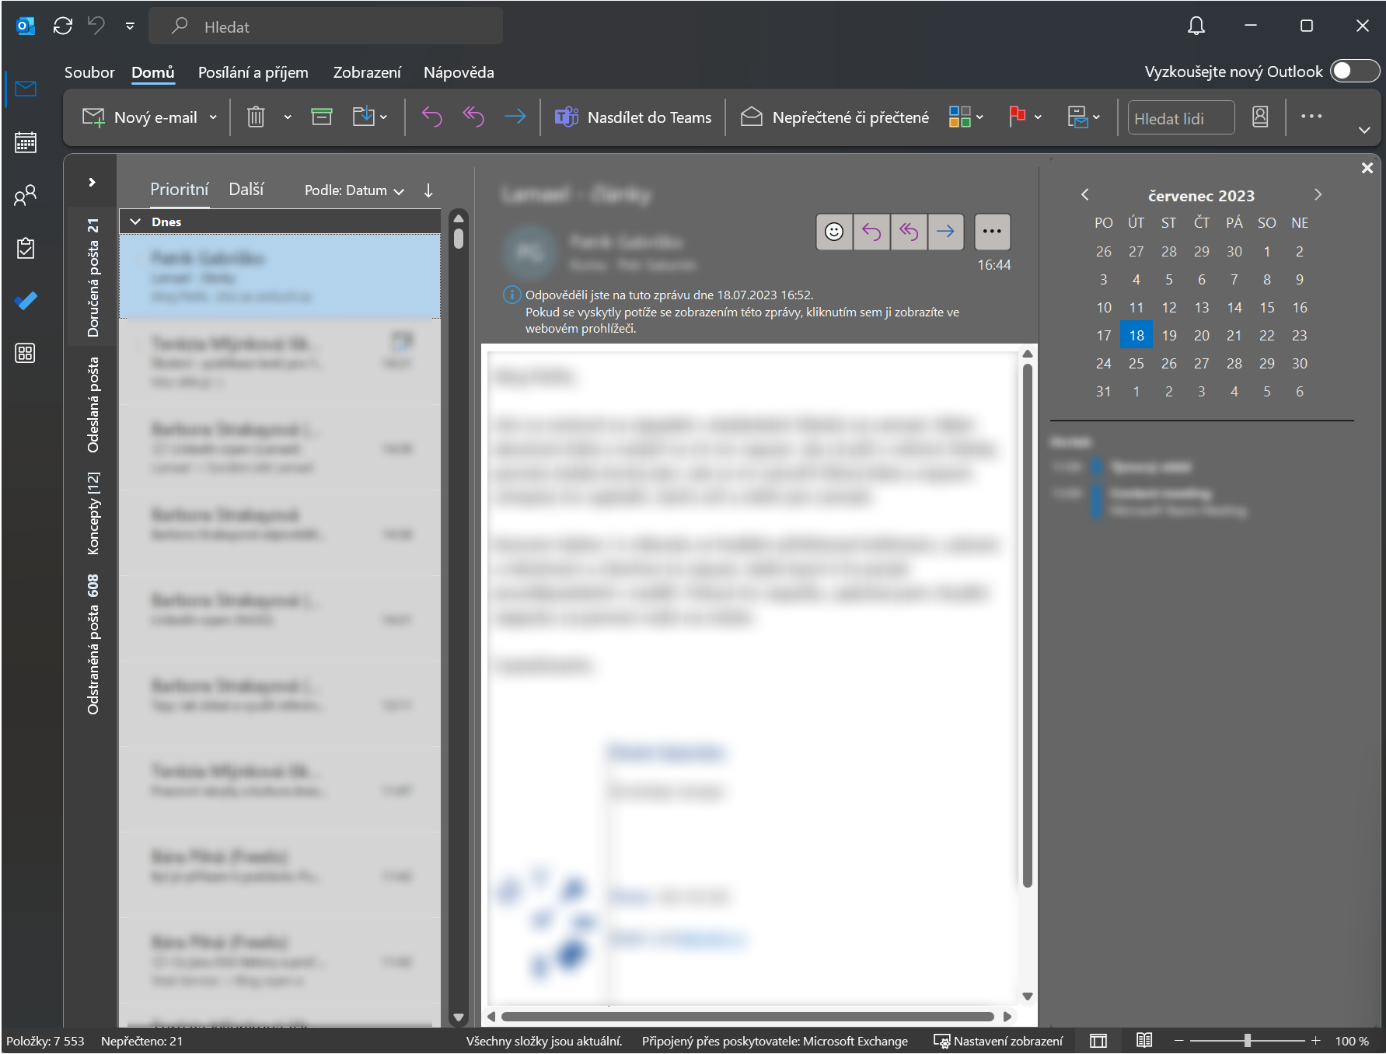
What are we looking at?
Contains the basic functional signpost. We describe the icons from top to bottom:
→ Tip: for a quick preview of events, we recommend turning on the mini calendar (which you can see in the right third of the image above). How to do it? Right-click on the calendar icon and select Anchor preview from the context menu.
No need for a long description here - the features are clear from the image. Clicking on the miniature arrow icon at the very top will expand the section into full view, including subfolders. You can customize and configure the entire section to your personal preferences, including the ability to add folders from all the email accounts you are logged into in Outlook 365.
You can see the default entries in the image above, but you can also add any custom folder here - right-click and select "Add to Favorites". Follow the same procedure to remove folders from your favourites.
This shows the emails contained in the folder you currently have selected in one of the left-hand bars. Above the bar, notice the "Priority" and "Other" tabs - Outlook automatically sorts incoming emails into these to separate important messages sent by real people from emails generated by bots. By clicking the "Sort By" option (pictured above Under: Date), you can set the parameter by which incoming emails are sorted.
It contains several handy features:
Tabs are text menus grouping tools according to their functional grouping. Clicking on any of the items (Home, View, etc.) will change the contents of the tab strip.
The tab strip (starting with "New Email" in the figure above) then represents the menu, which changes depending on which tab you have selected (see above). Here you will find basically all the tools and options you need to work with emails. If you want to expand the tab bar so that you can also see the corresponding text name of the tools, click on the small arrow (the beak pointing vertically downwards) in the bottom right corner of the current tab bar.
Finally, we're at the "heart of the matter", so to speak, which is actually creating, sending and forwarding messages in Outlook 365.
To compose a new message, press the CTRL+N keyboard shortcut or click the "New Email" button in the top left corner and a new window will open that looks something like this:
.png)
First, enter an address - click in the box next to the "To" button to see a listing of recent recipients; click directly on the button to see the complete address book synced with your email account. You can search the address book full-text.
The second line next to the "Copy" button works similarly, which is for secondary recipients of the message (i.e., you are initially sending it to them for their information or information).
→ Tip: How to make a hidden copy in Outlook that is not displayed by default? Click on the "Copy" button to open the directory. At the very bottom, you will see the "Hidden" item, where you can either select recipients from your contact list or insert a space and close the address book - Outlook will then display the hidden copy directly in the new message window, and you can insert the recipient in the same way as we described above for the "To" item:
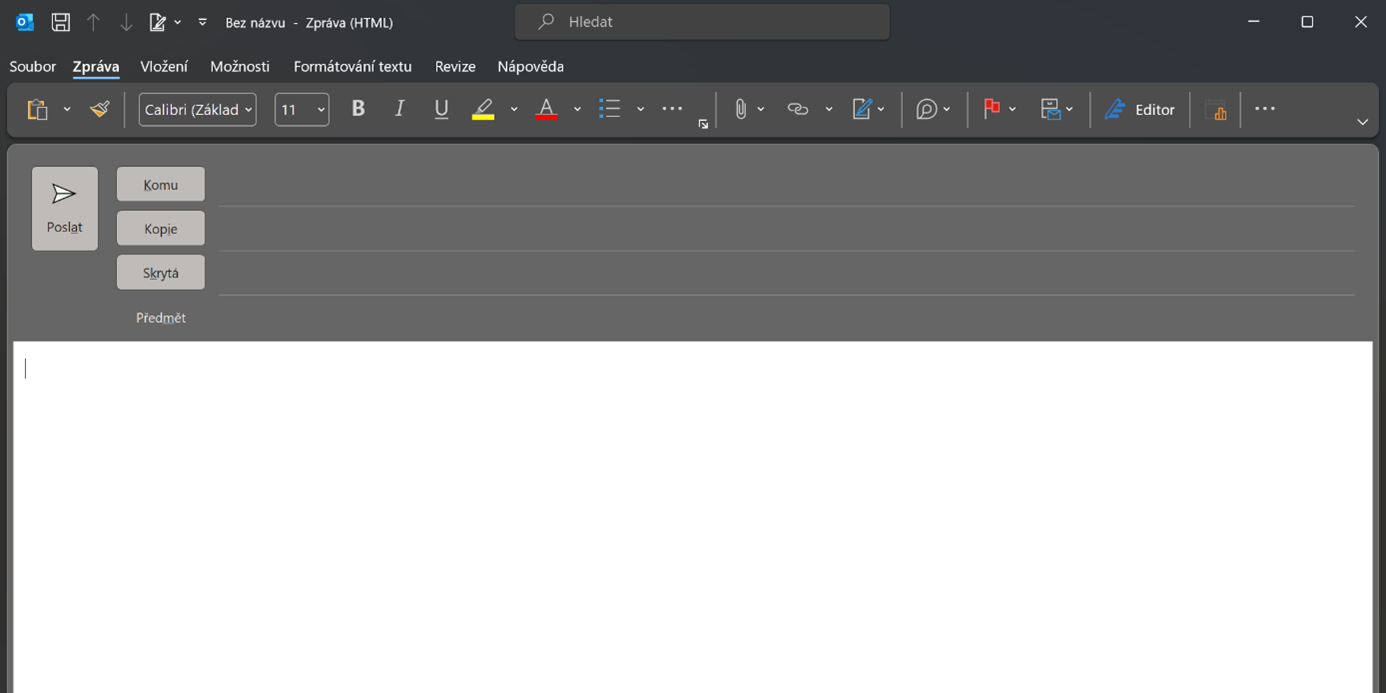
Don't forget to fill in the subject line - by ignoring it you are committing a slight offence against email etiquette. By filling in the subject, you will help the recipient to determine the subject and content of the message at a glance, as well as search back through the inbox.
Now you can get on with the actual composing of the email message. You can use the tabs on the top bar and their menus to format text, insert attachments, and more; you can open the emoji and smiley menus in Outlook the same way you do elsewhere in Windows, with the Win + . (dot) keyboard shortcut.
→ Tip: If you want to display more tools in the toolbar (e.g. in the picture above we have the option to format text into bullets, but we don't see the numbering option anymore), simply expand or maximize the window to display more items.
You can probably get by with the basic "Message" tab, where the most important tools are available - basic formatting, setting the importance of the message or attaching an attachment. Remember that large files (7-20 MB) are not advisable to send by email - the server may not accept them at all.
→ Tip: You can attach an attachment in two ways:
When the message is finished, you can send it by clicking on the "Send" button or by pressing the CTRL + ENTER keyboard shortcut.
A signature in Outlook can include text, of course, but also images or even a scan of your own signature. You can also have multiple signature variations. You can set Outlook to automatically add signatures to all outgoing messages, or just prepare and insert signatures into messages individually. How to do it?
→ Tip: It is easier to create a signature in Word and just copy it to Outlook. For corporate signatures, the easiest method is to get the signature from the corporate directory. If the signature is not available there, simply copy it from an incoming message from a colleague, edit the information in Word, and paste it into Outlook.
To send a reply, click on the email you want to reply to and then select one of the arrows in the top right corner (from left to right they have the functions: reply, reply all, forward). This will automatically insert a section for the text of the reply into the draft email. In this mode, the "Message" tab will open, but if you need to use a function that is not there, click on "Open in new window", which will display the environment as in the picture above.
We mentioned where to find the autocomplete function in the introductory part of the tutorial, where we discussed, among other things, the various settings. Just click on the "File" tab and click on the big "Auto Answer" button. Then follow these steps:
That's it - you're ready to start writing, deleting... and of course, forwarding messages. In the next installment of this guide, we'll discuss the more advanced features of Outlook 365: how to deal with spam, setting rules, automatic filters, priorities, etc.

Copyright © 2026 - Algotech a.s., all rights reserved
| Personal data processing |
Terms and conditions